When personalizing a SmartCanvas product you may be able to change some document settings, for example, change the overall size or margins. The rulers on the left and top of the product always show its current size.
1. Click
![]() on the SmartCanvas toolbar. The Document
Settings window opens.
on the SmartCanvas toolbar. The Document
Settings window opens.
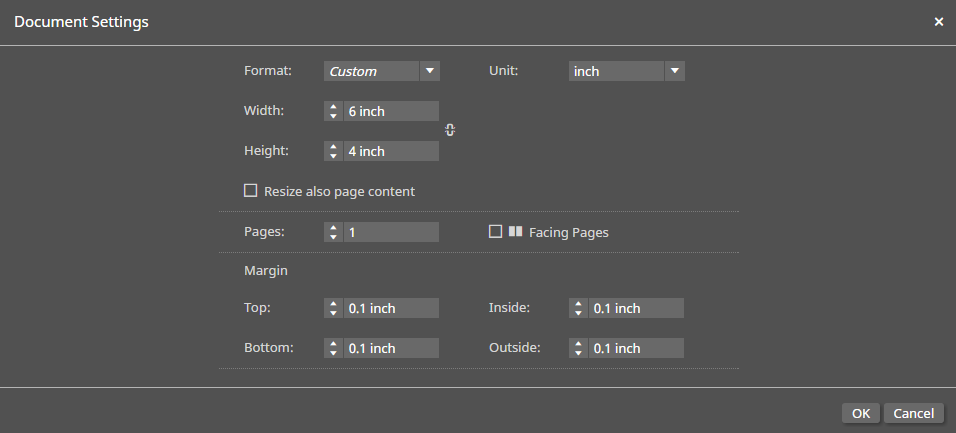
2. Review the information in the window. Unit is the unit of measurement being used for the dimensions and margins. If necessary, select a different Unit.
3. If necessary, make changes as described in the steps that follow.
4. If you want to change the size of the product (dimensions):
a. Specify a size in one of these ways:
● In the Format field, select a standard size such as Letter or A4. The Width and Height fields are automatically set.
● For a non-standard size, enter a Width and Height.
b. To
maintain the proportional relationship between width and height (also
known as the aspect ratio), click  .
This can prevent distortion.
.
This can prevent distortion.
c. If you want the contents of the design to be re-sized according to the changed size of the product, select the Resize also page content check box.
5. If the product has multiple pages, the Facing Pages check box may be available. Select this check box if you want to view opposing pages side by side.
6. Change the Top, Bottom, Inside, or Outside margins as necessary.
Note: Inside and outside margins apply when you have multiple pages. The inside margin is where two facing pages meet; the outside margin is on the opposite side so can be on the left or right.
7. Click OK.