SmartCanvas products may include note cards, invitations, posters, promotional flyers, or soft signage that you can personalize in various ways. For example, you may be able to format, move and re-size text, images, shapes, and QR codes, or add and format new text, images, shapes, and QR codes. What you can do depends on the product you selected. A SmartCanvas product is always displayed against a gray background with a toolbar at the top.
When you work with a SmartCanvas product, it is displayed on the right against a grey background with a toolbar on top.
● To give yourself more room to work with the product:
● Click
 at
the top left of the docked panel to hide it. The product now fills the
entire window.
at
the top left of the docked panel to hide it. The product now fills the
entire window.
● To
open the docked panel again, click  near the top left
of the window or click anywhere along the left colored edge of the window.
near the top left
of the window or click anywhere along the left colored edge of the window.
● Click Edit in Fullscreen in the header to expand the editor along with form fields.
· To exit full-screen mode,
press the Esc key or click  in the top-right
corner of the window.
in the top-right
corner of the window.
● To
open the edit mode, click  .
.
● To
open the preview mode, click  .
.
● To
collapse the Job Details panel, click  .
To expand it, click
.
To expand it, click  .
.
● In the edit mode:
● To
undock the left panel to make it a floating panel, click  .
.
● You can click on the floating panel and drag it to any position on the screen.
● You can position the cursor on the left or right edge of the floating panel and drag to resize it.
● To
dock the floating panel to its default left position, click  .
.
● To resize the docked panel, click the right edge of it and drag to expand to the desired size.
● If the product includes multiple pages they are displayed as thumbnails to the left of the page you are working on.
● Rulers are displayed on the left and top of the product so you can see its size. As you move around the product, dotted lines on the rulers show your position.
● If a product includes margins, they are identified by a pink line.
● If
a product includes bleeds, they are identified by a black line. A bleed
is an area that extends beyond the margins so that the image can potentially
fill the entire page in the final product (with no white showing). If
this button is available on the toolbar, you can click  to show/hide bleeds. By hiding bleeds, you can see what the product will
look like when printed.
to show/hide bleeds. By hiding bleeds, you can see what the product will
look like when printed.
● Sometimes, the Personalization pane on the left side of the window may offer a choice of designs so you can select the one you want.

● The Personalization pane may also include a form to fill out. What you enter in the form (for example, a first name, last name, and title) gets reflected in the product on the right.
● Save your work at any time by clicking Save at the bottom of the page. This allows you to return to the job later. If you are not registered on the site, you can register after clicking Save (you must be registered and logged in to save jobs and check out).
● Use the zoom controls to see more or less detail as you work.
You can also use:
● CTRL with + or the mouse scroll wheel to zoom in
● CTRL with - or the mouse scroll wheel to zoom out
● Click an object (for example, image or text) to select it.
● When an object is selected, right-click it for a menu of options. The options depend on the context (what is selected when you right-click).
● Use keyboard shortcuts to save time. These depend on what is selected when you use them.
● CTRL+C: copy the selected object
● CTRL+X: cut the selected object
● CTRL+V: paste a copied or cut object
● DELETE: delete the selected object
● CTRL+G: group the selected objects
● SHIFT+CTRL+G: ungroup the selected objects
● CTRL++: zoom in
● CTRL+mouse scroll wheel: zoom in
● CTRL+-: zoom out
● CTRL+mouse scroll wheel: zoom out
● If
you make a change you do not like, click ![]() on the toolbar.
You can undo multiple levels of changes. If necessary, you can click
on the toolbar.
You can undo multiple levels of changes. If necessary, you can click ![]() to restore what you undid.
to restore what you undid.
1. The Job Name defaults to the name of the product. If necessary, enter a different name so you can identify the job easily.
2. In the Quantity field, specify the amount you are ordering. The quantity affects the price. (If the product is ordered in multiples, you are warned if the number you enter is not a valid multiple.)
Note: You are warned if the Quantity you enter is invalid. For example, a product may have a maximum order quantity that you exceeded, or you may have entered an invalid multiple for a product that is ordered in multiples.
3. Ignore the Pages field; Pages are automatically determined by the number of pages included in your document, and shown here.
SmartCanvas products can be customized in either Single Mode or Batch Mode.
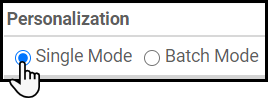
Single Mode products are designed to be personalized one at a time for a single record. For example, a business card for a specific person.
Batch Mode products are designed to be personalized several at a time for multiple records. For example, a promotional postcard that will be sent to multiple recipients.
Notes:
● Some Batch Mode
products are considered combos because they allow you to
enter some common data (single-record) and some versioned data (multi-record).
For example, a promotional postcard might include a common message or
promo code, but have individually unique recipient addresses.
● To learn more about uploading
and mapping data for a Batch
Mode product, please
see the following sub-topics in Personalizing
Multi-Record VDP:
-If Uploading Data from an
External File
-If a Data Source Is Available
-Check the Data Mapping
● Some Batch Mode products
are Direct
Mail products, which
involve additional steps unique to mailings.
● To learn more about Direct
Mail products, please
see Ordering
Direct Mail Products.
The remainder of this section covers Single Mode product customization.
If the product includes a form in the left pane, complete it with your information. Some fields may be required. The text that you enter in the form is automatically reflected in the product on the right.
If the form is set up to let you map data from a common data source (such as address book), you can choose the data source from the Common Data pull-down list.
● Click
a data source from the pull-down list to open the data source (e.g., the
Address Book). You can then choose any item from the list and click Mapping to map the data to the form.
● To change the Profile Image, click the Change link beside the image to open the gallery from which you can select another image.
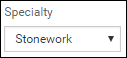
A form may also include lists of choices. For example, if you are personalizing a card for a landscape design business, you may get a list of specialties.
A form may also include images. Click an image to replace it with another image.
By default, you will be in edit mode when a SmartCanvas product opens. The changes you can make to the product depend on how it was configured. You may be able to do the following:
● Change document settings, for example, overall size or margins.
● Work with text, for example, add, edit, or format text or headlines.
● Work with images, for example, add or change an image.
● Work with shapes, for example, add or edit lines, rectangles, or ellipses.
Note: If the product includes more than one page, make sure you personalize each one.
If print (finishing) options are available for the product, you can select them when you are in preview mode.
1. Click Preview in the left pane. The product is displayed on the right.

2. If Print Options are listed in the left pane, make your selections.
3. For a summary of your selected options, click Review My Job at the top of the window. The Job Summary window opens with information about the options you selected.
4. If the product includes multiple pages, preview all of them.
Tip: To see more pricing details, move the pointer over the Unit Price area at the bottom of the window. (A pricing summary is not available for all products.)
5. To make any further changes to the product (for example, to text, shapes, or images), click Edit in the left pane.
1. When the product looks the way you want, click Add to Cart.
2. If asked, click I Agree to indicate that you have proofed the product.
3. Proceed with the checkout process when you are ready.
See also
● Working with objects in SmartCanvas products
● Working with images in SmartCanvas products
● Working with text in SmartCanvas products
● Working with shapes in SmartCanvas products
● Working with QR codes in SmartCanvas products