
Depending on the SmartCanvas product, you may be able to add or format shapes such as rectangles, ellipses, or lines. Use the SmartCanvas toolbar to add these shapes.
1. On
the SmartCanvas toolbar, click ![]() .
(If the product does not allow you to add rectangles, this button is unavailable.)
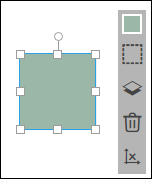
The rectangle is displayed with a toolbar next to it.
.
(If the product does not allow you to add rectangles, this button is unavailable.)
The rectangle is displayed with a toolbar next to it.
Note: If the product already includes a rectangle, click it to see what editing options are available to you.
2. Drag the rectangle (from its center) where you want it and use the handles to re-size it.
3. Do any of the following depending on the options available to you:
● Add or change the background color.
● Arrange the rectangle in relation to other objects (move forwards or backwards).
● Size or move the rectangle or rotate it.
● Click
![]() to delete the rectangle.
to delete the rectangle.
An ellipse can be a circle or oval.
1. On
the SmartCanvas toolbar, click  .
(If the product does not allow you to add ellipses, this button is unavailable.)
The ellipse is displayed with a toolbar next to it.
.
(If the product does not allow you to add ellipses, this button is unavailable.)
The ellipse is displayed with a toolbar next to it.
Note: If the product already includes an ellipse, click it to see what editing options are available to you.

2. Drag the ellipse (from its center) where you want it and use the handles to re-size it and change its shape (for example, make it oval).
3. Do any of the following depending on the options available to you:
● Add or change the background color.
● Arrange the ellipse in relation to other objects (move forwards or backwards).
● Size or move the ellipse or rotate it.
● Click
![]() to delete the selected ellipse.
to delete the selected ellipse.
You may be able to add decorative lines to a SmartCanvas product.
1. On
the SmartCanvas toolbar, click  .
(If the product does not allow you to add lines, this button is unavailable.)
The line is displayed inside a box with a toolbar next to it.
.
(If the product does not allow you to add lines, this button is unavailable.)
The line is displayed inside a box with a toolbar next to it.
Note: If the product already includes a line, click it to see what editing options are available to you.
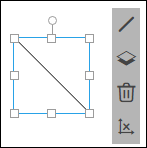
2. Drag the line (from inside the box) where you want it and use the handles to re-size it.
3. To
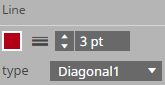
format the line, click  and then do any of the following:
● Select a width for the line.
● Select a color for the line.
Tip: You may be able to customize colors.
● Change the position of the line in relation to the box that surrounds it, for example, select one of two diagonal types or select top, bottom, left, or right to place the line on that side of the box.
4. Do any of the following depending on the options available to you:
● Arrange the line in relation to other objects (move forwards or backwards).
● Size or move the line or rotate it.
● Click
![]() to delete the selected line.
to delete the selected line.
See also
● Working with objects in SmartCanvas products
● Working with images in SmartCanvas products
● Working with text in SmartCanvas products
● Working with QR codes in SmartCanvas products